Other important uses of devices
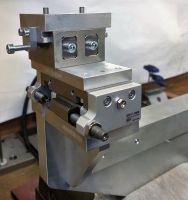
Cross transport device for automation device
- Saving of work steps, such as setting up during welding or drilling.
- Saving of skilled personnel when using safe and accurate fixtures and setting up of multi-machine operations.
- In the case of manually operated jigs and fixtures which have to be moved or rotated during use, the mass should be small so that the production process can be carried out with "feeling".
- Achieve great uniformity in the execution of manufacturing operations (tolerances, machining quality).
- Reduction of non-productive times and workpiece change times, because e.g. insertion, determination, clamping and removal can be carried out more quickly.
- Fixtures tie up capital and require minimum quantities in production. Workpiece families can often be formed, which increases the number of pieces.
- Development and production of fixtures can be shortened with modular fixtures. Such jigs and fixtures can often also be borrowed.
- Automated production processes are not feasible without jigs and fixtures that are adapted in level.
- For geometrically simple parts, workpiece-unspecific fixtures are sufficient, while for parts of complicated shape and variable size, workpiece-specific fixtures must be designed.
- Jigs and fixtures may also be required for clamping and guiding tools, e.g. the use of a drilling template.
- The work objects to be accommodated by jigs and fixtures, mostly workpieces and sometimes semi-finished products, must have a minimum degree of uniformity, cleanliness, dimensional and tolerance compliance and ease of handling, such as a design suitable for clamping
Furthermore, the interactions between clamping force, workpiece and clamping device must not push the defined position and orientation of the workpiece out of the permissible limits before and during machining. Uncontrolled deviations from the nominal position lead to production errors. Concessions can be made with regard to positional accuracy (accuracy of position and orientation) if the real alignment of the workpiece-fixed coordinate system with the machine coordinate system is determined in a measuring process before machining.


